Friday, September 30, 2011

The "R" is finally finished!


Okay I know that the "R" finally being finished means absolutely nothing to you, but for me its a huge whew moment.  I cannot describe the angst this one little project has been giving me!  I think its because it really stands for something a whole lot bigger, and that's whats really getting to me.  It stands for my Master Bedroom re-do.  I am now starting the process of redecorating my master bedroom.  This project was the first step of MANY in that process.  It's my goal that everything that goes into my master Bedroom be something that I have created or already owned.  Crazy ambitious I know, it's as if it is a personal journey of sorts, and I am so excited about it.  Now on to this angst riddled project.

Its a decorative wall art "R".


I love how it came out!  


Originally it was just supposed to be the white letter on the gray canvas

but it just seemed stark, dry, and cold.  Not exactly the mood you want in a Master Bedroom you are trying to turn into an oasis of calm!  So after seeing many different embellishment ideas on Pinterest I decided to go with this flower one.  (I will go into more detail about how to create it on another post).  I loved the 3 dimensional effect it has, as well as the unbridled look where the canvas just can't contain it.  I also gave it a good coat of sealer/shine to give it a warm glow.  

I almost forgot to mention one of the cooler aspects of this that really impressed my husband.  
My nifty recycled hanger. 

Yes, your eyes aren't deceiving you, that is a tab from a soda can hot glued on there.  
I found this idea at apartmenttherapy.com via Pinterest via D and couldn't wait to try it out. It works great!


All in all, although there were hours of indecision poured into this simple art, I love the final result and I feel like I am starting off on the right foot for my Master Bedroom re-do.  There are many more projects ahead so keep an eye out for them.

Please leave me a comment letting me know what you think and what you might have done differently on the embellishments   I already have a few I want to do on the next "R".  Who knows I may like your idea and do it too.  I am always on the lookout for great ideas.

Have a great day and God Bless your family.

Linked up to:
Photobucket                           thecreativepaige.com                           NightOwlCrafting
                   The Shabby Nest
Photobucket                    Tickled Pink at 504 Main                         Designer Garden


Photobucket   

Fantabulous Friday! Chic on a Shoestring Decorating  Making Monday Marvelous Linky Party

Monday, September 26, 2011

31 Day Challenge

So there is this Blog that I really enjoy following called The Inspired Room .  Last year she challenged herself to do a 31 day series on fall decorations.  If you don't blog you probably aren't aware how difficult it would be to blog each day for 31 days straight.  So I was super impressed that she was able to do that.  Well this year she got together with a couple of other bloggers to do it again, and they thought it would be fun to have even more bloggers involved.  So they have issued a LARGE group Challenge for other bloggers to come up with a theme, and do a 31 day series with them.  After contemplating if this was something I could even do with my insane hectic life, I decided I would take the challenge.
My focus on this 31 day challenge is to appreciate beauty in something or someone each day.  To make a concentrated effort to slow down and smell the flowers so to speak.  I will be sharing each day about something I find beautiful and why. From my family, to God, nature, my crafting, and my friends.  You never know what will make it in the daily spotlight.
So try to stop by at least every couple of days and see what I find. I would love it if you would like to do this with me, even if you don't write a blog!  Just comment on my posts and let me know what beauty you are appreciating in your day or just to encourage me.  I think I am going to need all the encouragement I can get to successfully meet this challenge!

I also made my VERY FIRST BUTTON for this that you can grab and put on your own blog if you like.  To say I am proud of myself is putting it lightly...lol I am learning so much!!! (and that's just beautiful...har har)
Mommy x 3 = Insanity


Wish me luck I will start on October 1st and I am very much looking forward to it!

Have a great day and God bless

Thursday, September 22, 2011

Yep, its a Bloomin' Tutorial

This is a tutorial on how to make the felt flowers that were part of my Square Fall Yarn Wreath from last week.   While they neglected to comment on my blog, I had a few friends come to me wanting to know how I made my flowers.  I asked them if they had checked out any of the one MILLION tutorials in the blogasphere for felt flowers.  Ummm... NO, they hadn't, and just wanted me to spill.  Well I have to admit that I really haven't seen any tutorials that show how to do them the way that I made mine.  So I figured I would make it one million and ONE!

First I cut out 9 circles about 3 inches in diameter (across, for you non-mathy folks) of each color felt

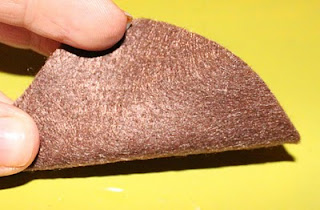
Next I folded each circle in half

Then I fold half back over diagonally then the other half you fold the other direction to form an "S"

At this point you insert a straight pin through it above where your fingers are to hold it in the "S" pattern.  Also this is pretty much the same way you start a lot of the other felt flowers.  Now we get to where my flower differs from the other tutorials I have seen. The way you put it together...

Most tutorials say to glue them flat where you can (for lack of a better explanation) read the "S" but I glue mine on their side so it looks a little like waves or the edge of a pie crust. Oh & 
DONT REMOVE THE PINS YET!!!
(you can see some of my straight pins sticking through my pieces)

After you get these 7 pieces glued down you put a HUGE gob of glue in the center and put the remaining two pieces with the pinched in going straight down into the glue.  If you look at it from above you should be able to "read" the two "S's" & DON'T REMOVE THE PINS YET!!
I folded it back so you can see how I attached the center two pieces in the gob of glue

now the last step is to wait until all the glue is completely dry then remove the pins and start to gently pull apart the "S" shapes.  Some will fold back into the "S", some will be fonkey wide, and some will do what you want.  Which is to crinkle up into multiple smaller folds.


If you want a tighter, crinkly flower use the 9 pieces I stated, but if you like the looks of the looser tan flower only use 7 pieces (5 around and still 2 in the middle) Either way they still are AWESOME!!  The great thing about these is that they are useful for all sorts of things like hair flowers, pillows, clothes, purses... the list is really endless, and they were a blast to make!!! Hope you try it out and have as much fun as I did, and be sure to leave me a comment telling me what you think and if you did try it!  

Have a great day and God bless!


Monday, September 19, 2011

An Insane New Look

I have been shaking things up over here at 
Mommy x 3 = Insanity!!   
When I first started blogging I used a generic template offered by Blogger.  Then I found the world of  plug in blog elements.  I enjoyed the simplistic ease of that, but I always worried in the back of my mind that somewhere out there was a blog that looked JUST like mine!  That fear was realized a couple of days ago as I was blog hopping.  Suddenly I came across the cutest blog.  You can see it here:

Look familiar???  Yep that's exactly what my blog looked like!  I loved her content, and its a great blog, but it looked JUST LIKE MINE!!!

Well the crafty "I love to be original" part of me started throwing a tantrum to beat all tantrums.  I'm talking fist pounding, foot stomping, "I don't EVEN think so!" kind of tantrum.  It was NOT pretty folks!

After calming that part of me down I decided it was time to pull my big girl britches on, and get to work.  So to work I got.  Not crafting, but designing none the less.  First I chose a color palette.  Yellow and gray are my current color obsessions with a little turquoise thrown in here and there.  So that what I went with.  

Next I worked on my original, made just by me banner. I am in love with it!!  

Finally I picked out the coordinating font style, font colors, and background colors. And voila a new blog design for Mommy x 3 = Insanity was born.

I still have a ton to learn about blog design and am doing my best to improve.  There are still a few options on here that I haven't quite figured out how to use yet.  But when I do, honey bar the door, I will go crazy with them lol.

Hope you like the new look! Please let me know what you think by leaving a comment below. 
Thanks!!
Have a magnificent day, and God Bless!

Sunday, September 18, 2011

It stinks, so clean it for cheap!

A while back I ventured into the realm of homemade products that I would normally just buy.  I made my own diaper wipes.  I was very sceptical at first, but have become a true believer after having tried them out.  For my first try I followed the tutorial found here:


But there were several things I didn't like about it.  The wipes seemed to dry out too quick for me and they weren't as softening as I would have liked.  It seemed like the scent really just wasn't strong enough, and they weren't big enough to suit my taste.  So I made up my own recipe that I am going to share today.

You will need:
1.) boiled water (I skipped this step the first time and just used plain ole tap water...ummm take the five min to boil a pot of water It makes a difference!)
2.) your favorite baby soap (tear free)
3.) baby oil
4.) strong cloth-like paper towels like Viva or Bounty that wont shred or disintegrate when wet
5.) air tight leak proof container on the largish side
6.) zip-lock baggie, quart sized (if doing the purse pack)
7.)serrated knife
8.) measuring cups and spoons

Okay once you have all of your materials assembled lets get going.

(yes I am using an old cookie dough plastic container...hey I like to re-purpose and at home I am the only one who will see it.  Plus my kids think its cool that wipes come from the cookie jug lol)
First you will cut your paper towel roll with the serrated knife.  The first time I made these I cut it exactly in half as the other tutorial suggested, but I found that to be too small when wiping mess from my two year old's hiney.  So I cut this one at two thirds.


Once its cut you will need to remove the cardboard from the center.  If you decide to make a small purse pack like I did then take it from both sides.  If not then just the side you are going to use. Then set aside.


Now its time to make the solution. 
You will add 4-4 1/2 cups boiling water to you air tight container if doing the purse pack and the larger side too, or just add 3 if only doing the larger side .  You can wait for it to cool if you like (I didn't let mine cool enough and I regretted it in a couple of steps).


Then you add 3 1/2Tbsp baby soap to the water if doing the whole roll (purse pack too).  If only doing the bigger side just add 2 1/2Tbsp. Swish it around good, but don't let it froth and bubble up.
Then add 4Tbsp of baby oil for the whole roll (purse pack too), and 3Tbsp for just the larger side, and swish around again.


That's all there is to the solution.  Yes, really!!  Wasn't that easy?!?!?!

Okay now for the more hands on difficult part (not really I just like to keep it thrilling and interesting)

***Skip this step if you are not doing the whole roll/purse pack****
Take the small one third roll and drop it in the mixture, and pretty quickly lift it out.  Then squeeze the excess solution from that small roll back into the large tub of solution, and put it in the empty water pan or empty dish to set. Make sure the entire roll is wet all the way through though. (this is where the too hot water gave me problems.  I may or may not have scalded my hands a little squeezing VERY hot water from this)


Next set the big roll in the container and leave it.

***Don't read if you aren't doing the purse pack...that's right, it's NOT ALLOWED, and privileged info for purse pack users ONLY***
If you did the purse pack then during this soaking time period, if by some chance your water was say too hot for you to get much water out of the smaller roll after soaking it, you would want to re-squeeze that roll so the water will run over the now soaking big roll.  Go ahead and see if any water has seeped out even if your water wasn't too hot, because it may need to be squeezed again anyway.

Okay after about a min or two look, as best you can without lifting the roll from the container, to see if most if not all of the Solution mixture has been soaked up(it should be). If so, then put the lit on the container and flip it upside down for 10 min.  This is where the air tight and spill proof part comes in (just in case you were wondering if that was for a purpose other than in case they mysteriously fell off a table after a two year old had been playing suspiciously nearby).


****Don't read if you are only doing the big roll****
While this is setting, take your smallerr roll and put it in a nice zip lock baggie.  If you have something different you think would work better than a baggie, then by all means feel free to use it. Oh let me know what it is too please ;) I love hearing about your ideas!!  This is just what I came up with and it is working wonderfully for me.


Finally, when the 10 min are up, flip the container right side up.  Start your wipe roll from the center like those cleaning wipes you buy in canisters from the store, and you will be done.  DONE just that quick!!


And ENJOY a clean happy soft tush on your baby. 

****Purse Pack readers ONLY****
Three days later, I am absolutely loving my purse pack!!  It is the cold and allergy season here in N.Alabama and my runny nosed little boy has been wiped with these all day!  They are working so much better than tissues!  Because I squeezed a lot of the water out, and they aren't wringing wet, they aren't too wet to wipe away snot.  The baby oil is soft and gentle keeping his much wiped nose from chapping and turning red, while the soap cleans easily.  They also easily removed stickiness from his fingers after Sunday School treats too because thay aren't completely dry either.  So this is totally a WIN /WIN!!   

As always, I hope you enjoyed my ideas and creative twist on things.  Please let me know what you think in the comments section.  I love to hear from you!

If you have any ideas about how I could improve or change up this project or how it would work better for you by all means tell me all about it!  I look forward to reading your ideas and comments!

Have a great day and God Bless!


Saturday, September 17, 2011

Wreath Love

I have been feeling so neglectful of my craft time, and of my blog this week!  The photography and music sides of my life have been getting a heaping portion of my time.  I know that's still using my creative talents, but its just not the same as creating something tangible.  I like to see my work setting on the shelf, hanging on the door, or myself or my kiddos wearing it.  It just feels so good in an elemental way to say WOW, I made that! (and probably saved a buck or two too!)

So I went into a crafty place yesterday where I just started creating like crazy.  A couple of things were finished, and a few more are now in a holding pattern.  Here is my absolute favorite thing that I made.  So favorite that I refused to go to bed until it was finished.  I LURVE IT!!!!!!

Enough of the teasing lets get to it...

I have been lusting after the square wreathes I have seen on Pinterst like these:

This one is from a blog that I LOVE

Found using google

Then there are the wonderfully warm and cozy looking yarn wreaths that I cant seem to get enough of

Like this one from a now closed (I'm assuming since the link no longer works) Etsy shop:


But I had not seen ANY square completely wrapped in yarn wreathes.  I did see this half yarn frame wreath from This Blog and totally love it, but was looking for more coverage  

So I went to work gathering all my supplies:
A frame ($1 thrift store find, Holla!!)
Yarn
Felt
Hot glue gun and glue
Wooden letter


I began by painting my raw wood frame white.  There really isn't a good reason for this other than the fact if it showed through at all I wanted it to have a finished, not raw look.

Next I figured out where on the wreath I wanted which colors.  The orange seemed the loudest color so I chose to put it on the smallest sides.  Next I started the wrapping process by gluing one end on the back side of the frame.


Then I wrapped and wrapped and WRAPPED.  Now on the first side I made my first mistake...I thought it needed to be wrapped tightly...ummm NO.  If you decide to make one of these please don't try to wrap tightly.  Snug is best and then go back flatten the pieces and arrange them putting a dot of glue here and there to keep them where you ultimately want them. See if you can figure out which side I did tight and which side was just snug

That's right, the tight side is on the right!  UGGHHHHH!! The fibers of the yarn were pulled so tight that, while at first glance, it looked like I was covering the side well, I really wasn't.  I had to do a little more arranging and gluing in place of the yarn after seeing the few gaps on the other sides, but that was easy peezy compared to all the arranging I had to do to fix the side that I messed up on. 

See what I had to do to make the tight side look good? I pushed the yarn up and down making a space that I could cover two different ways. 
1: wrap more yarn on it or 
2: cover it with one of the embellishments I already planned on putting on the wreath

Ummmmm I went with number 2! 

Finally I had the yarn pretty much how I wanted it, the "R" wrapped in the multi-brown yarns and, the felt flowers made.  I tried a few different arrangements until I was happy with the placement and color combinations.

I started gluing like crazy and this is the final product hanging on my door.

Did I mention how much I love it??  I did?  well let me say it again... I LOVE IT!!!  and fall is starting to show up in my decorations finally.  I love Fall and can't wait for my entire house, not just my front door, to reflect the season.

Leave me a comment letting me know what you think.  Is there anything you would have done differently?  I love hearing new ideas!

** I linked this post up with
The Crafty Blogstalker
Romantic Home
the Inspired Room


The DIY Show Off